By the healthiergang writer Maruen Rare, calisthenics coach (www.)
How to do the vertical?
Today I show you a progression for reach the handstand on two hands, running smoothly and building our skill month by month, safely and optimally.
On the web you can find many enthusiast tutorial, athletes and trainers who show you a strategy among many, some on personal experience, some for technical and theoretical preparation.
What I am showing you today contains both a personal experience and an experience as a trainer, verified on many of my students.
By now we know very well how the shoulder mobility is a key factor in achieving the perfect vertical.
For matters of accident prevention and also for a matter of optimization of the gesture and therefore an energy saving (the latter means that we have to apply less force to keep the vertical) it will be good to never neglect the mobility of the shoulders.
Neglecting the general warm-up in which you will have to have raised the body temperature, heart rate, pressure and brought enough blood in all the peripheral areas of the body, with exercises on the rope, bodyweight with running and sprinting etc ... let's move on to a specific warm-up on the shoulder (but that we can do for all other joints).
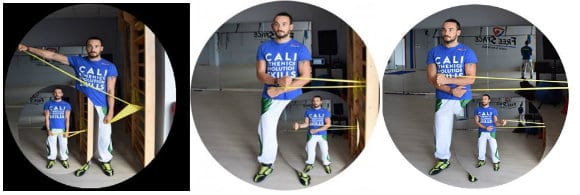
The joint should be heated with circular movements, extension, flexion, extra and internal rotation, etc ... in short, in all angles of movement in which the shoulder can move in space. Below I show you some strengthening and warm-up exercises to be performed with rubber bands:
Using a rubber band or a light resistance loop band, perform 20 repetitions of each exercise:
In the next few lines that follow you will increasingly find a series of exercises to reach the vertical, also called the handstand. Once you have identified your level, continue from that point.
For each exercise I will make you work on 50% of your cargo, this for an infinite number of reasons:
? when working with high loads, it takes a trainer to supervise the execution, in order to avoid accidents and risks of injury. Especially if you are a beginner, your body is not yet conditioned to work with high intensities and your tendons need more time to carry heavy loads.
? with this method you can finish the workout, concluding all the series with extreme ease, concentrating on a perfect execution of the gesture (even on days when you will be tired), prevailing over the neural system and the ability to recruit more and more muscle fibers, thanks to the amplified signal that is will develop from time to time.
? you can also train several times a week, with 1 or 2 calls, given the ease of recovery due to the low intensity of work.
Let's go!
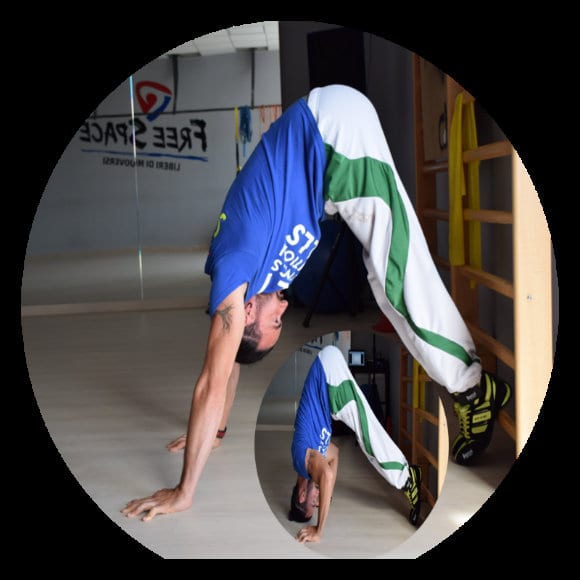
Level 1: V-push Isometric
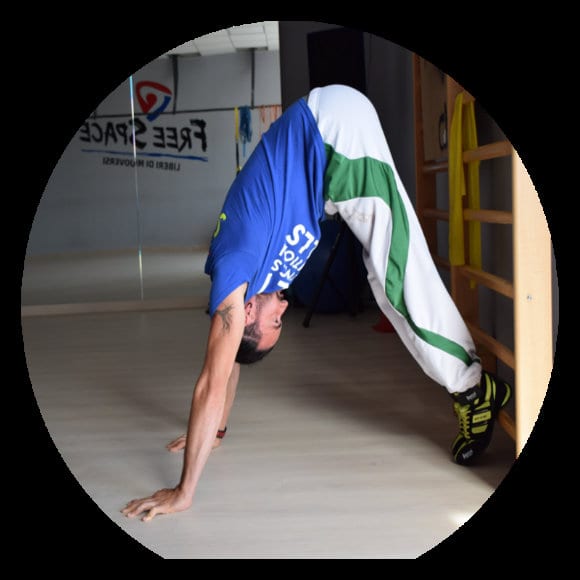
Matches leaning your heels against the wall or at the back, to keep the weight resting only on the toes and the heel well raised, the legs must be extended, the abdomen hollow, the gaze turned towards the feet, the hands extended and that they form a continuous line with the torso without breaking the V formed between the torso and the legs.
Hence the name of V push... the hands must be at a distance equal to that of the shoulders with the palms wide open and all the weight distributed on the hand.
ps Variant for those with wrist stiffness problems to use low parallettes, following the same indications. However, I recommend improving the wrist mobility to switch to the original version.
Calculate your ceiling in isometric gear, with perfect execution and work with 5 sets at 50%, after 45 weeks if you have reached a maximum of isometric resistance equal to 60 ”, go to the next level.
Being isometry in itself an angle dependent exercise, you will greatly increase the strength and resistance on this angle which in the future will guarantee you a solid push and hold.
The gesture itself is also an exercise in active mobility, which will allow you, when you reach the exercises where you will try to stand vertically.
Let's continue!
Level 2: V Push Up
After level one you shouldn't find it difficult to make the exercise from static to dynamic, if this does not happen, I advise you to take a step back and work better on the first level.
The start of the exercise is the same as for level 1, from here, I fold my arms projecting my body without losing the V that forms torso-legs and I go down with elbows closed and eyes turned to the feet, I touch my head and go back up.
The heel during the entire execution of the gesture remains raised, the hands are at a width equal to that of the shoulders, the fingers are wide open and the weight is distributed over the entire surface of the hand.
THE abdomen is sunken and pushes in the bowels.
By rearranging the arms back to the starting position and repeat, I calculate the ceiling.
If my ceiling falls between 8 and 14 repetitions, I stop at this level and work at 50% with 5 sets for 4 weeks, exceeding the maximum 14 repetitions the following month, we can continue with our program.
In case you are unable to reach 8 repetitions in this level, use a step or an increase, to be placed under the hands and which allows you to reduce the range of movement, making it easier.
Use this facilitated variant for 4 settimane and then try to do the complete exercise again.
We are almost there, in a few months you will detach one handestand with tightness and perfect execution ... work in progress and we go to level 3.
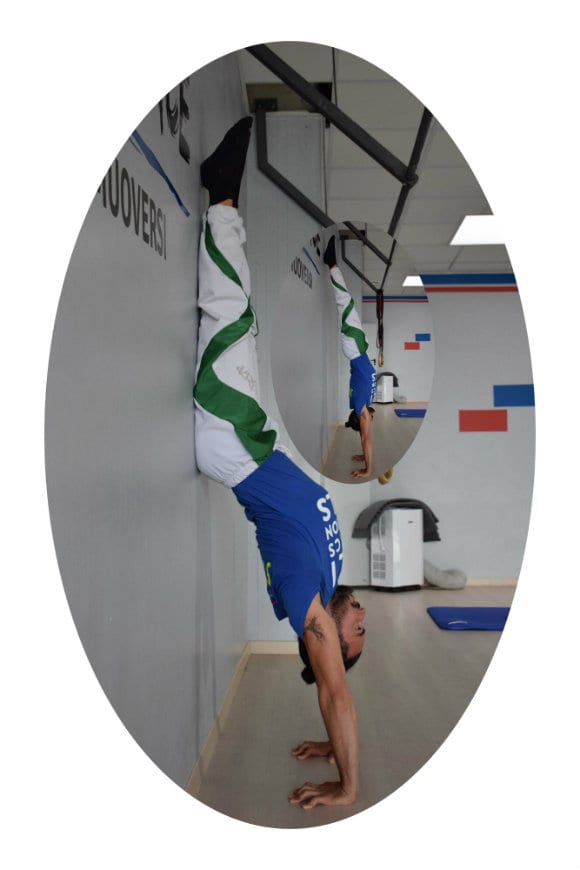
Level 3: Handstand belly to the wall
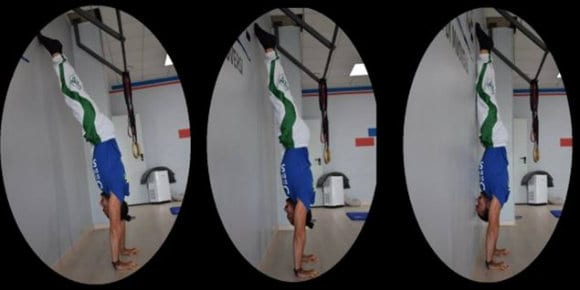
We will divide this level again into 3 phases (as you see in the picture), this is because it is not certain that you will be able to immediately perform the exercise with your body perfectly parallel to the wall.
Level 3a
Place your hands three spans from the wall, bring your legs against the wall and straighten your legs, place your instep, look towards the wall, from here making a little force with the instep against the wall, I go to look for the maximum retroversion of the pelvis (in this position it proves easier).
I keep the maximum thrust until I feel that the shoulders are no longer there and they begin to retract. At that point I gather my knees to my chest and go down.
Stay at this level for 2 weeks if you can stay at least 20 ”, otherwise wait a week before moving on to Level 3b. Even at these levels I work with the 5 × 50% methodology.
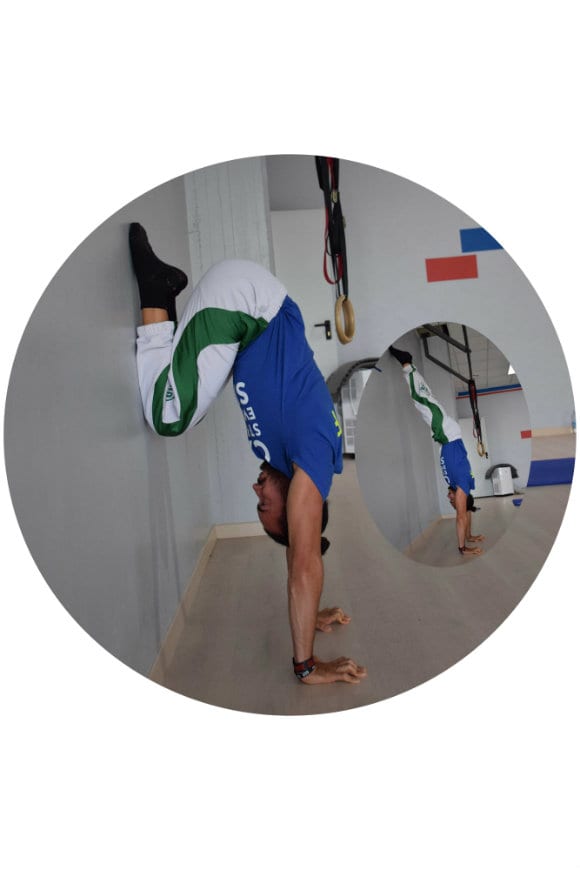
For the Level 3b the same recommendations mentioned so far apply, except that I place my hands a span from the wall, it brings less force on the instep to seek the hollow position, too much push with the instep would lead to a forward imbalance of the body.
If you followed my directions to the letter, you should find yourself starting on the 4th week of the belly-to-wall handstand exercise Level 3c, then with my hands resting 23 fingers from the wall, I still perform this step for 2 weeks and then you can move on to the next step.
This level divided in this way also allows all those people who are afraid of being upside down with the fear of overturning, to approach calmly and cautiously, overcoming this fear, finding security and solidity step by step.
At this exact point, we are in a position to have a perfect line for the handstand !! line and solidity taken.
Now we are left with only control.
From this step on, the variations are endless, it becomes a game, and the exercises are aimed at activating all those muscles that with very small contractions give us stability and balance.
I show you the ones I have chosen for you from a very large repertoire.
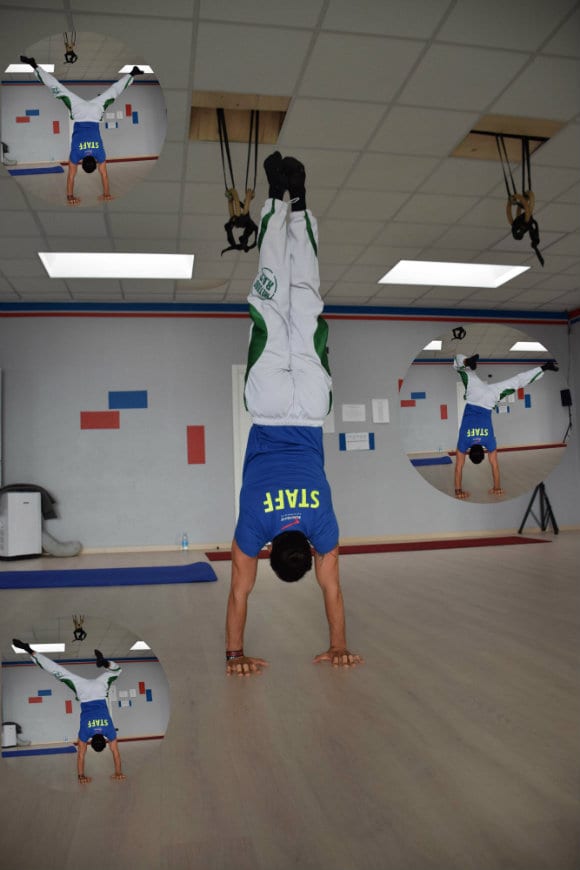
Level 4: Back To Wall Handstand
Level 4a
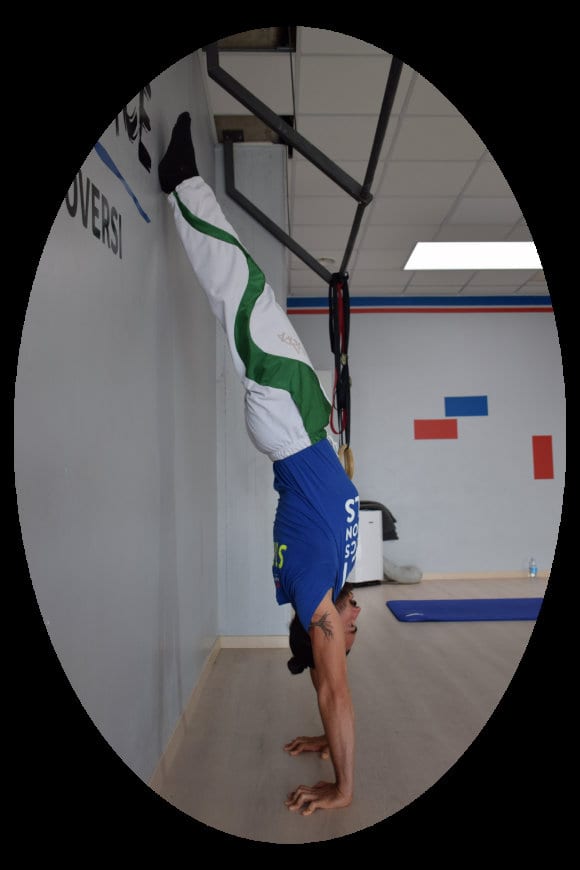
Level 4b
These two versions must be alternated to send more information to the snc, which will better process the equilibrium variables both when you are unbalanced forward and when you are unbalanced backwards.
With the work done so far, you should have acquired a good resistance to be able to push your hands upside down comfortably 30 ”. So one day you can train the variant Level 4a and another day to train the version Level 4b.
In both versions, the same rules mentioned up to now always apply:
? continuous push with the shoulders
? arms outstretched
? look towards the wall
? retroversion of the pelvis and tight abdomen
? legs extended and spikes that push towards the ceiling
Run this program for 4 weeks with a 5 × 30 ”.
Congratulations! Maybe you don't know, because you simply wanted to do things literally and so you never tried to get it free out of curiosity up to this point. but if you have followed all the work up to here, by now you should have a good free vertical hold with also a good secondary.
You have reached a great milestone and in alone 45 months!
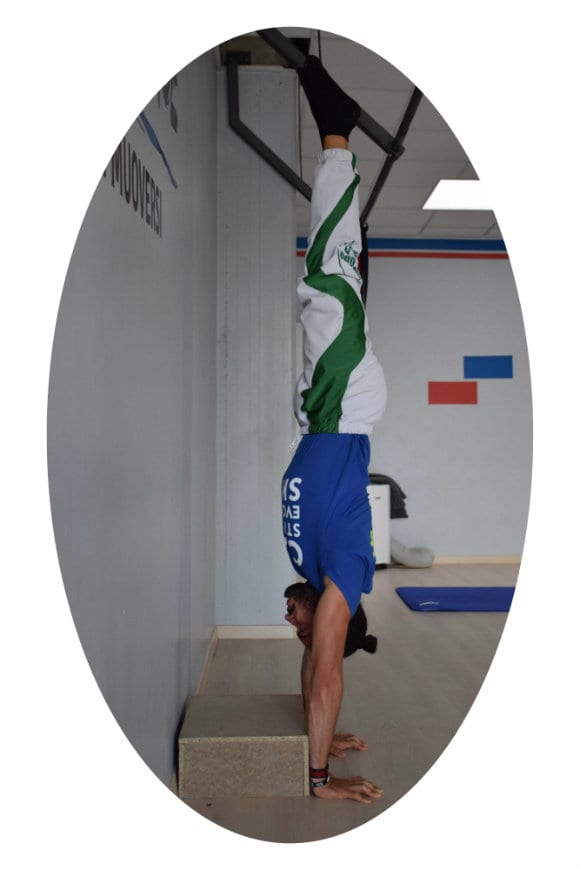
However, I recommend that you still do the Level 5 that will allow you to solidify the skill and make it yours, both in an optimal state of your body and your energies and in a state of deficient energies.
Complete this level for 4 weeks alternating the exercises I show you and at that point the handstand will be one more skill in your repertoire.
This exercise will help you refine the line, emphasizing the gesture on the retroversion of the pelvis.
Position yourself as you can see in the figure and from them contract the buttocks and abdominals at the same time to bring the pelvis into retroversion, thus detaching yourself from the wall, repeat the movement 15 times for 3 series.
Starting from the tuck HS position, I extend my legs against the wall without ever losing the line and keeping the lumbar curve straight. This will increase your control and line skills. Do 15 reps for 3 sets.
Now from the vertical, create instabilities to stimulate your body to receive more feedback, to process more information and to allow you to stand on your hands upside down in all conditions.
Good vertical!